11 Apr 2018
|
Python
Algorithm
CodeJam
Google
Jekyll
오랜만에 블로그를 쓴다.
알고리즘, Code Jam
알고리즘과 그리 친하지는 않지만, 아예 손을 놓지 않으려고 매년 Google Code Jam에 참가 신청을 한다.
매년 예선만 통과하자라는 생각으로 크게 욕심부리지 않고 있는데, 다행히 매번 예선은 통과했었다.
작년부터는 파이썬에 좀더 익숙해지기 위해서 파이썬을 이용해서 문제들을 풀고 있다.
Code Jam 2018, 그리고 파이썬
참가신청만 해놓고 완전히 잊고있다가, 주말에 늦잠자다 일어나서 컴퓨터를 켜보니까 메일이 와있다.
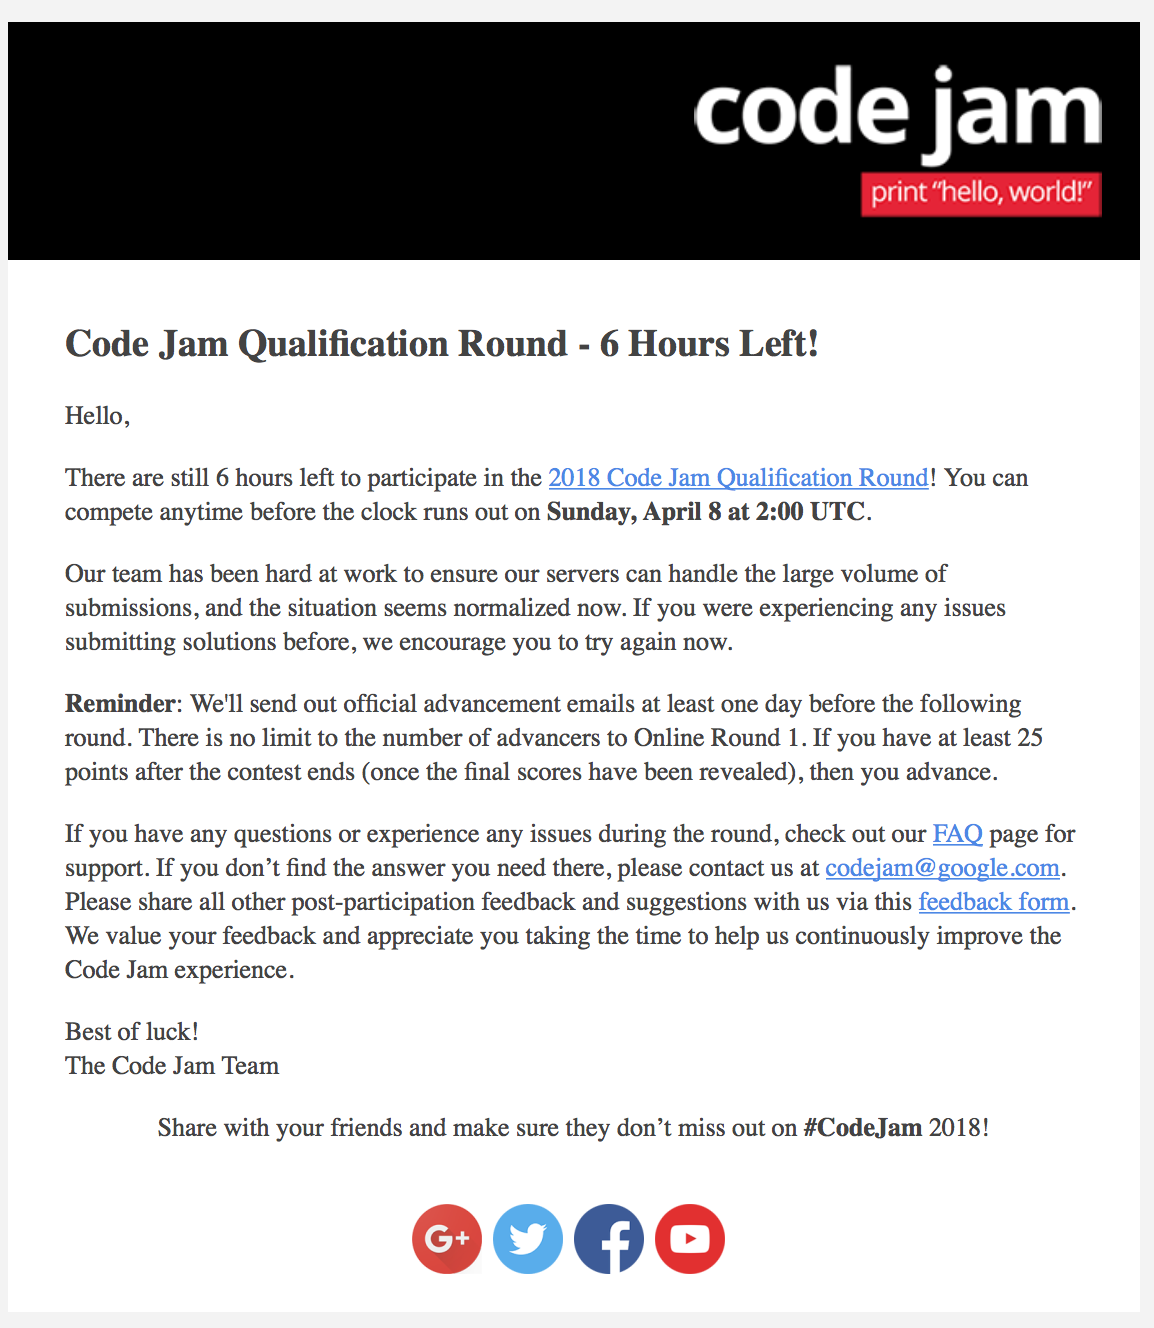 말이 여섯시간이지… 나는 아침까지 자느라 2시간도 채 안남았다고…
그래도 예선 통과를 위한 점수를 맞추기는 할만할것 같아서 Code Jam 사이트에 접속!
분명 작년까지는 small input과 large input의 데이터셋에 각각 프로그램을 돌리고,
output 파일을 제출했던 Code jam 형태가 갑자기 online judge 형태로 바뀌었다.
코드도 페이지 상에서 작성하여 바로 제출할 수 있는 형태로 바뀌었고, 따로 입력 데이터가 주어지지 않는다.
그리고 테스트 파일을 다운받을 수 있는 뭔가 새로운 양식의 문제도 하나 끼어있는 것 같다.
그리고 judge가 버벅이는지 이에 대한 안내 문구까지 출력되고…
그래도 문제를 둘러보니 1, 2번만 풀면 38점으로 예선을 통과할 수 있을 것 같다.
다행히 시간내에 1, 2번을 다 풀고, 결과를 확인하는데..
2번의 15점 배점 문제가 TIME_LIMIT_EXCEEDED가 나서 실패했다.
쉽다고 생각한 문제에서 틀린 이후 제일 먼저 든 생각은 Python의 느린 입출력 때문이 아닐까라는 생각이 들었다.
input() 대신 sys.stdin.readline()을 썼어야 하나 등등…
작년까지는 로컬에서 아웃풋 파일을 만들어서 업로드를 하면 되는 형식이라,
입출력 속도에 민감하게 신경쓰지 않았기도 하고, 코드가 돌아가서 결과만 나오면 된다는 생각이었으니 말이지.
라운드가 끝난 이후 Analysis를 살펴보고 실제로는 내 구현상의 문제였다는 것을 알게되었다.
‘시간초과가 난 것은 파이썬이 느리기 때문이다.’라고 생각한 내 자신이 민망하기도 하고,
결과적으로는 처음으로 예선 라운드에 떨어지게 되었지만 오히려 더 배운것은 많았던 Code Jam이었다.
그리고 jekyll
작년 12월 경 MacOS가 High Sierra로 업데이트 되면서 Ruby 2.0이 지원되지 않게 되었다.
덕분에 Ruby Gem으로 이루어진 Jekyll 또한 먹통이 되었다.
(한동안 블로깅을 멀리한 탓에 내가 jekyll 사용법을 까먹은 줄 알았다…)
jekyll을 다시 사용하려면 거쳐야 할 방법에 대해서는 아래 링크 참조..
https://github.com/jekyll/jekyll/issues/6637
24 Jul 2017
|
Android
Java
Firebase
firebase 프로젝트 추가
https://console.firebase.google.com에서 프로젝트 추가
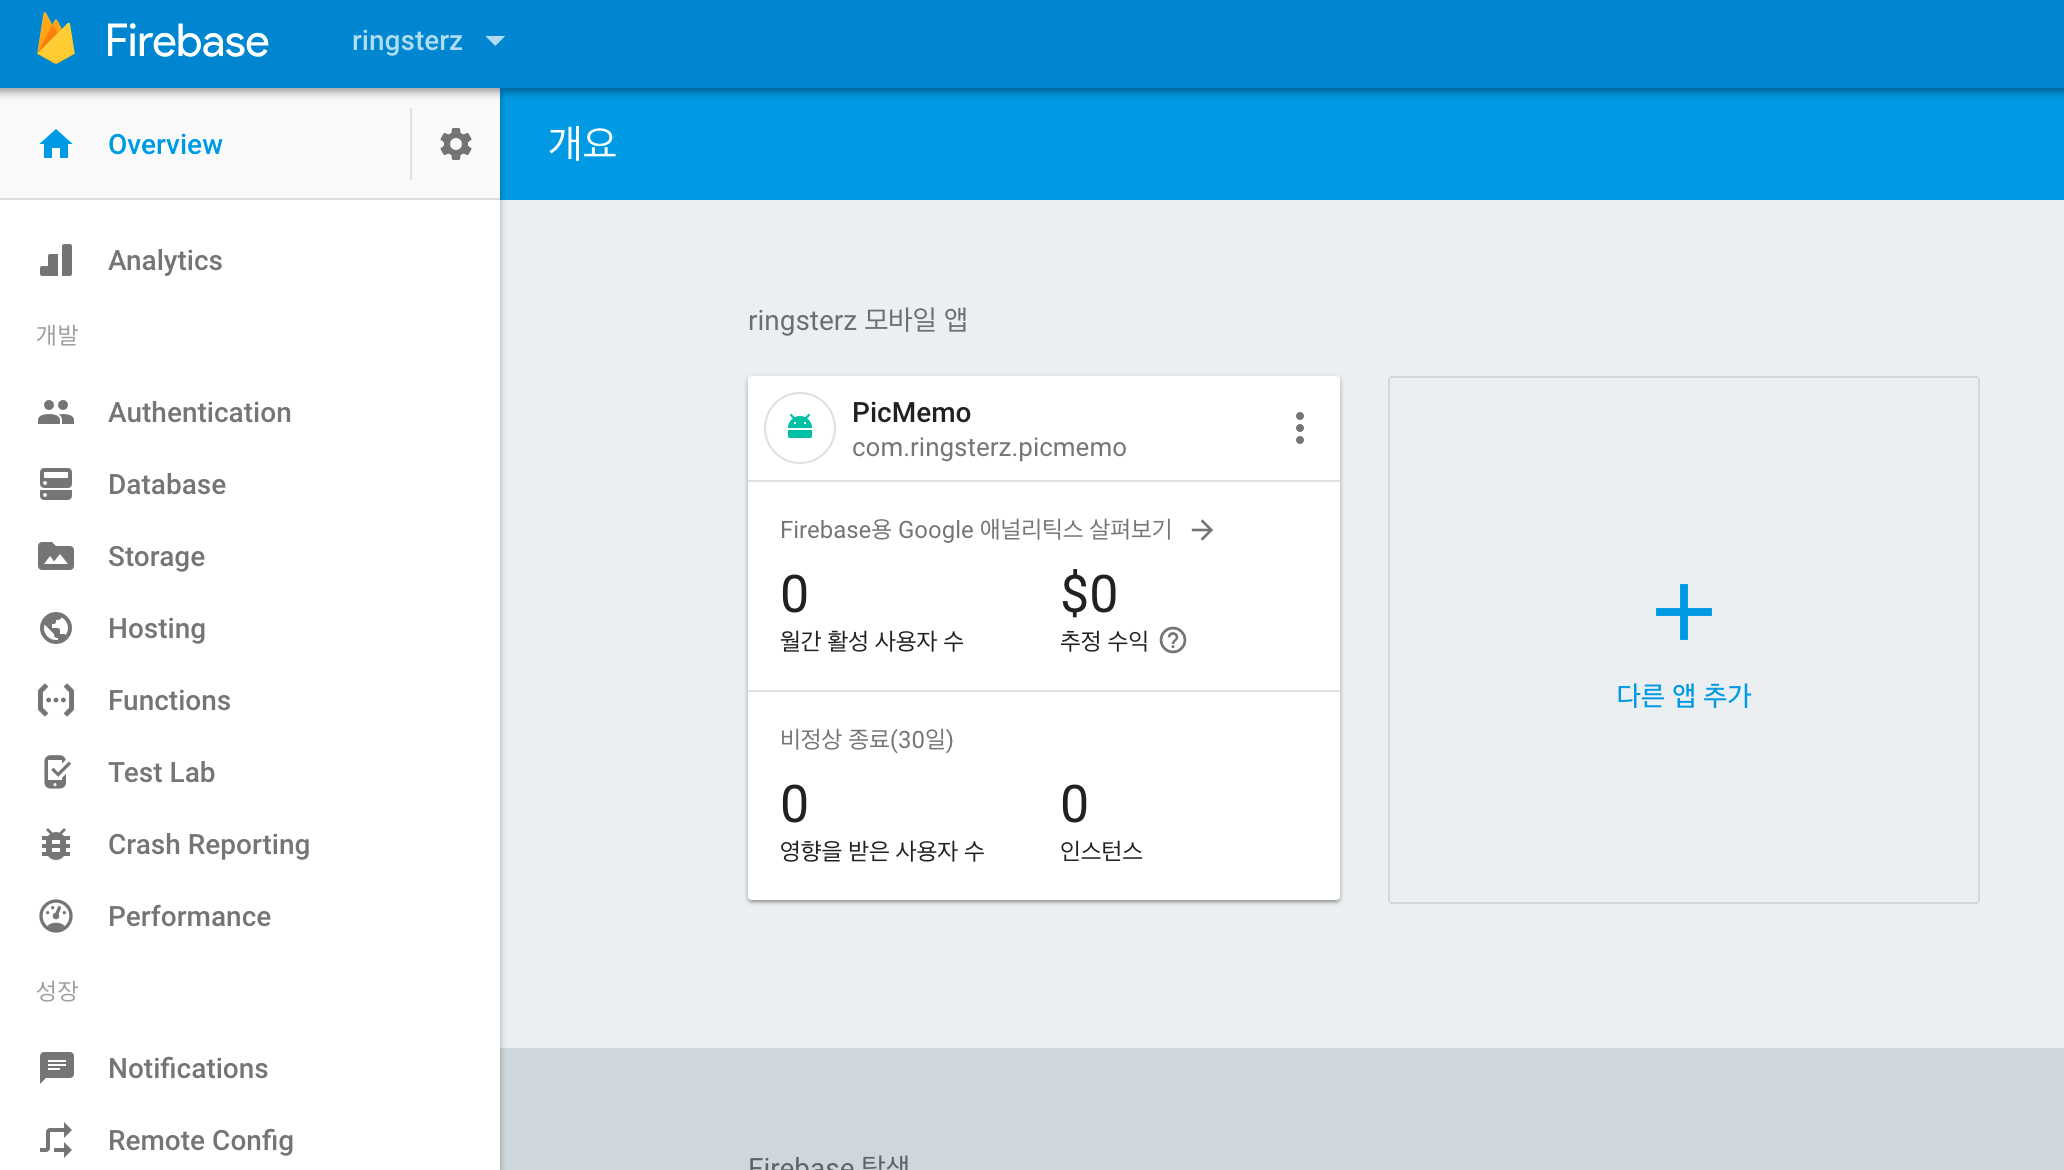
firebase 안드로이드 추가
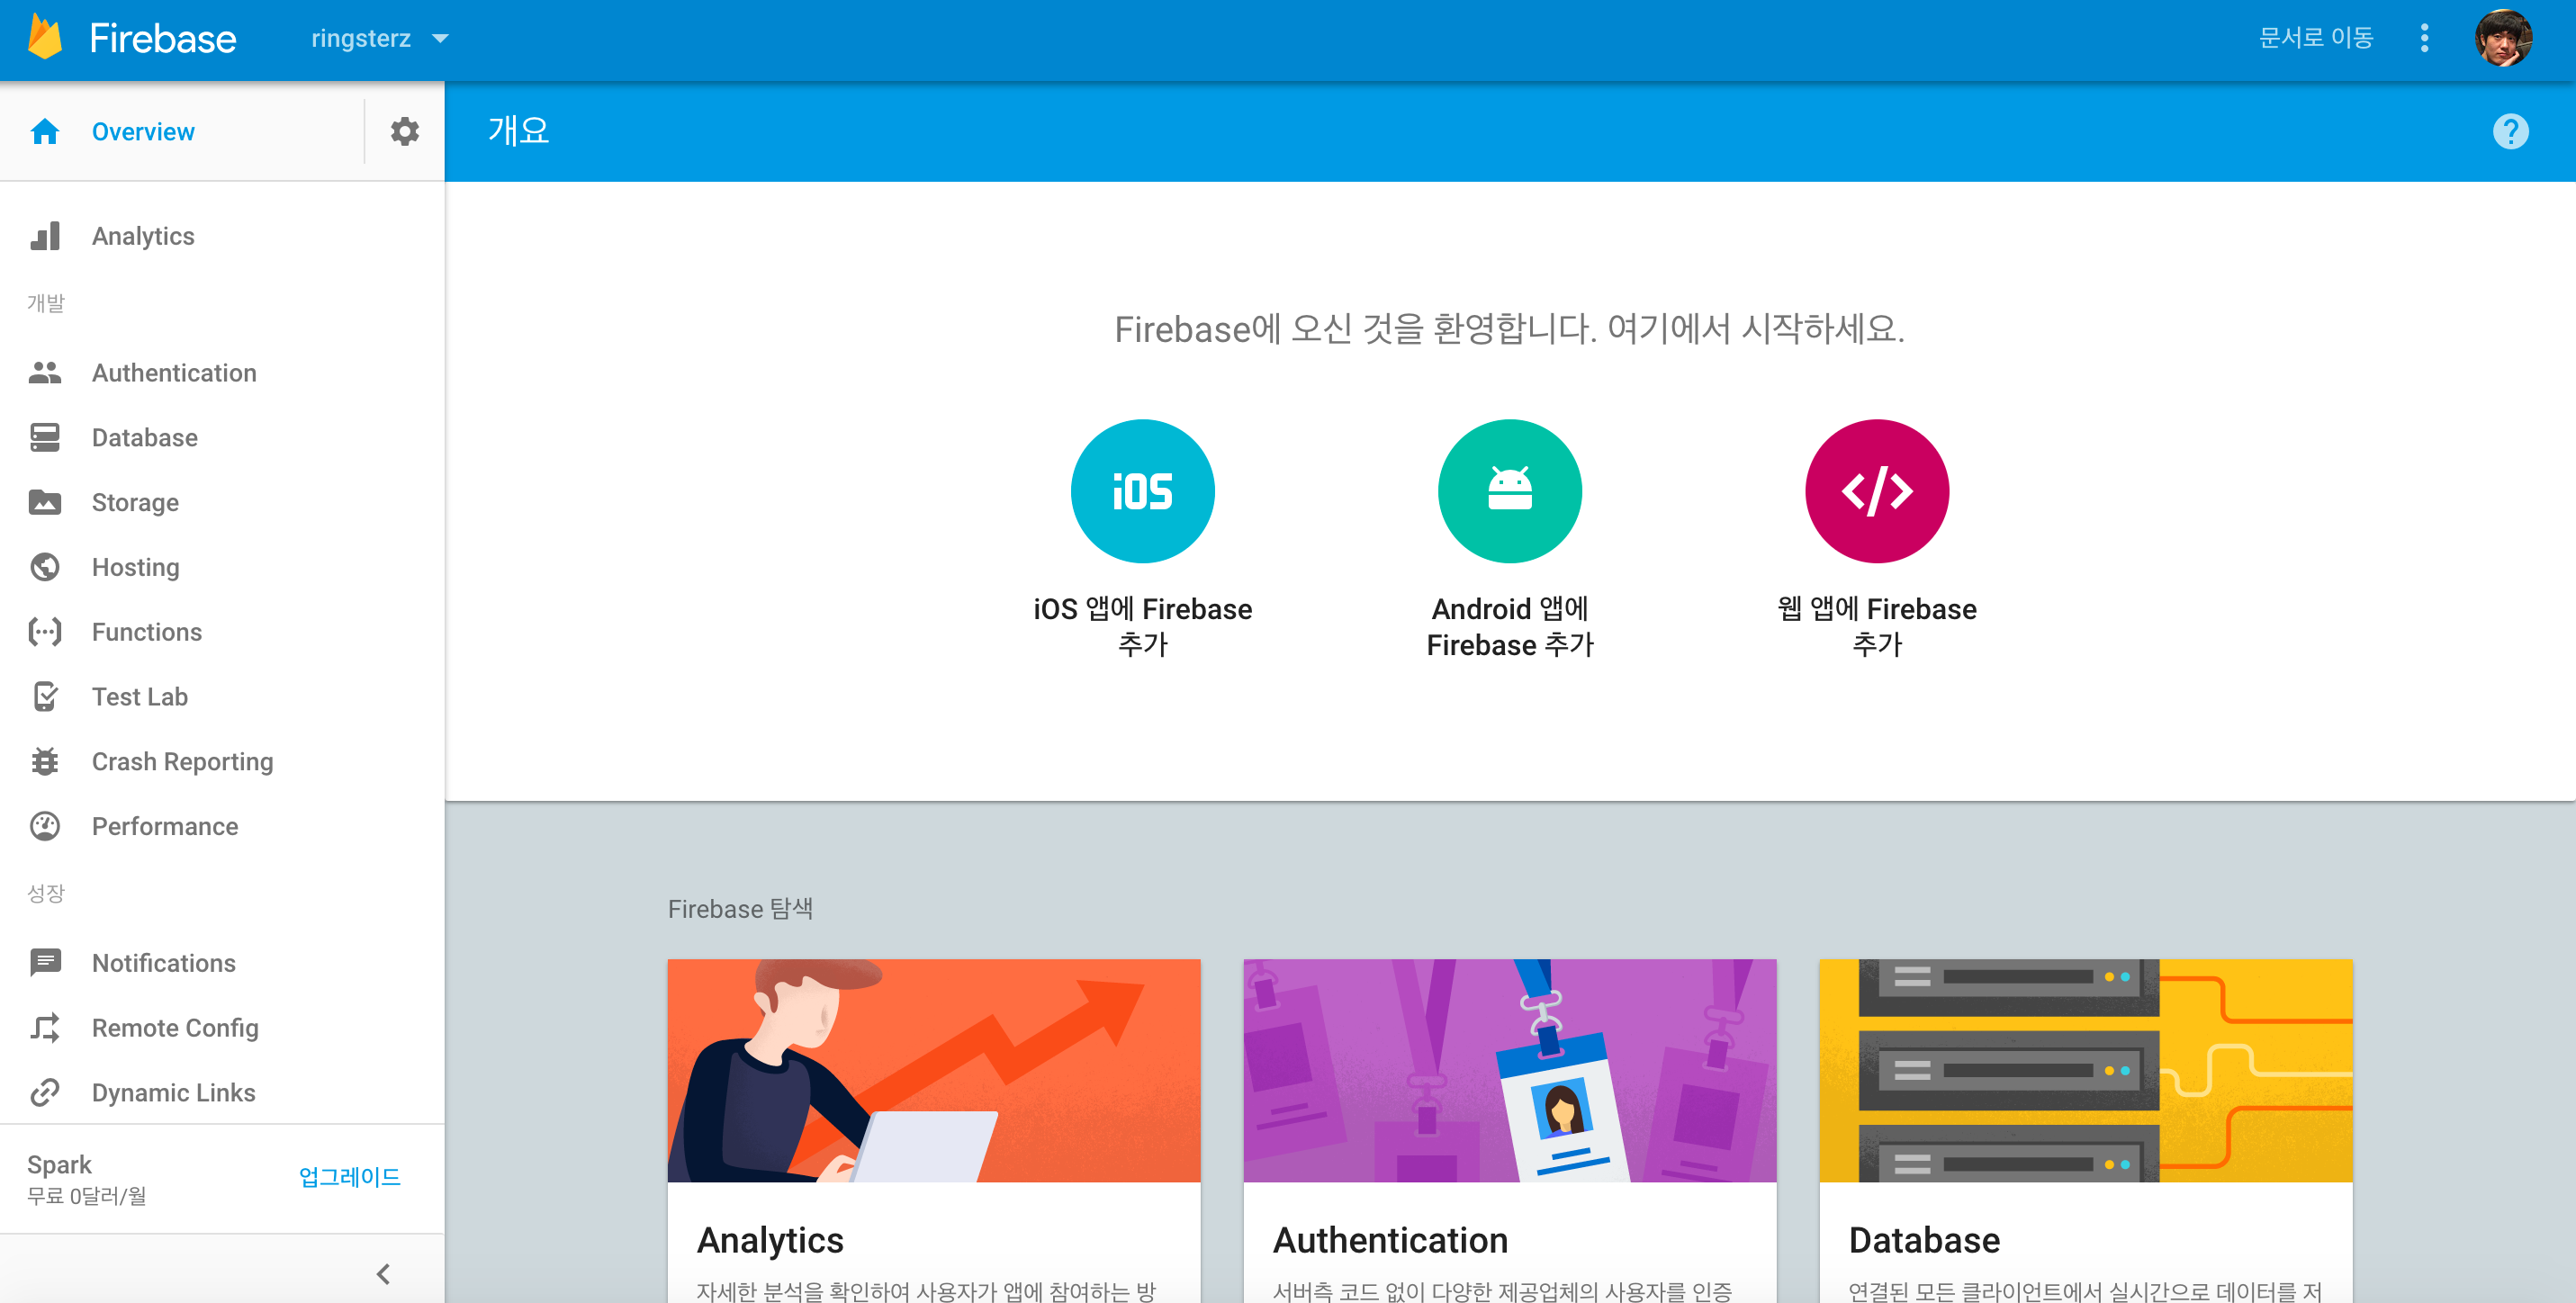
google-services.json 추가
google-services.json 파일을 app 영역의 root에 집어넣음. (project 보기)
build.gradle 변경
build.gradle(project)에 다음 추가
dependencies {
    classpath 'com.google.gms:google-services:3.1.0'
}
build.gradle(app) 마지막줄에 다음 줄 추가
apply plugin: 'com.google.gms.google-services'
build.gradle(app)의 dependency에 다음 추가 (database 및 recyclerView 이용을 위한 라이브러리)
compile 'com.google.firebase:firebase-database:11.0.2'
compile 'com.firebaseui:firebase-ui-database:0.5.3'
이후 프로젝트 sync
Model 추가
public class Notice {
    private String subject;
    private String content;

    public Notice(){

    };

    public Notice(String subject, String content) {
        this.subject = subject;
        this.content = content;
    }

    public String getSubject() {
        return subject;
    }

    public void setSubject(String subject) {
        this.subject = subject;
    }

    public String getContent() {
        return content;
    }

    public void setContent(String content) {
        this.content = content;
    }
}
RecyclerView item layout 추가
<?xml version="1.0" encoding="utf-8"?>
<LinearLayout xmlns:android="http://schemas.android.com/apk/res/android"
    android:layout_width="wrap_content"
    android:layout_height="wrap_content"
    android:orientation="horizontal">

    <TextView
        android:id="@+id/subjectTextView"
        android:layout_width="wrap_content"
        android:layout_height="wrap_content"
        android:layout_margin="@dimen/text_margin"
        android:textAppearance="?attr/textAppearanceListItem" />

    <TextView
        android:id="@+id/contentTextView"
        android:layout_width="wrap_content"
        android:layout_height="wrap_content"
        android:layout_margin="@dimen/text_margin"
        android:textAppearance="?attr/textAppearanceListItem" />
</LinearLayout>
RecyclerView layout 추가
<?xml version="1.0" encoding="utf-8"?>
<android.support.v7.widget.RecyclerView xmlns:android="http://schemas.android.com/apk/res/android"
    xmlns:app="http://schemas.android.com/apk/res-auto"
    xmlns:tools="http://schemas.android.com/tools"
    android:id="@+id/noticelist"
    android:name="com.ringsterz.picmemo.fragment.ItemFragment"
    android:layout_width="match_parent"
    android:layout_height="match_parent"
    android:layout_marginLeft="16dp"
    android:layout_marginRight="16dp"
    app:layoutManager="LinearLayoutManager"
    tools:context="com.ringsterz.picmemo.fragment.NotificationFragment"
    tools:listitem="@layout/fragment_item" />
변수 선언 및 viewHolder 정의 (프래그먼트나 엑티비티의 inner class로 추가)
private DatabaseReference mFirebaseDatabaseReference;
private FirebaseRecyclerAdapter<Notice, MessageViewHolder> mFirebaseAdapter;
private LinearLayoutManager mLayoutManager;

public static class MessageViewHolder extends RecyclerView.ViewHolder {
    TextView subjectTextView;
    TextView contentTextView;

public MessageViewHolder(View v) {
    super(v);
    subjectTextView = itemView.findViewById(R.id.subjectTextView);
    contentTextView = itemView.findViewById(R.id.contentTextView);
    }
}
RecyclerView와 adapter 설정 및 observer 설정 (Fragment)
@Override
public View onCreateView(LayoutInflater inflater, ViewGroup container,
Bundle savedInstanceState) {
View view = inflater.inflate(R.layout.fragment_item_list, container, false);

// Set the adapter
if (view instanceof RecyclerView) {
    Context context = view.getContext();
    recyclerView = (RecyclerView) view;
    mLayoutManager = new LinearLayoutManager(context);
    recyclerView.setLayoutManager(mLayoutManager);

    // New child entries
    mFirebaseDatabaseReference = FirebaseDatabase.getInstance().getReference();
    mFirebaseAdapter = new FirebaseRecyclerAdapter<Notice,
        MessageViewHolder>(
        Notice.class,
        R.layout.fragment_item,
        MessageViewHolder.class,
        mFirebaseDatabaseReference.child("notification")) {

    @Override
    protected void populateViewHolder(final MessageViewHolder viewHolder,
                                    Notice notice, int position) {
    if (notice.getSubject() != null) {
        viewHolder.subjectTextView.setText(notice.getSubject());
        viewHolder.contentTextView.setText(notice.getContent());
        }

    }
};

mFirebaseAdapter.registerAdapterDataObserver(new RecyclerView.AdapterDataObserver() {
    @Override
    public void onItemRangeInserted(int positionStart, int itemCount) {
        super.onItemRangeInserted(positionStart, itemCount);
        int noticeCount = mFirebaseAdapter.getItemCount();
        int lastVisiblePosition =
            mLayoutManager.findLastCompletelyVisibleItemPosition();
        // If the recycler view is initially being loaded or the
        // user is at the bottom of the list, scroll to the bottom
        // of the list to show the newly added message.
        if (lastVisiblePosition == -1 ||
            (positionStart >= (noticeCount - 1) &&
                lastVisiblePosition == (positionStart - 1))) {
            recyclerView.scrollToPosition(positionStart);
        }
    }
});

recyclerView.setAdapter(mFirebaseAdapter);

}

return view;
}
Rule 설정
인증하지 않고 데이터를 받으려면 Firebase console에서 아래와 같이 읽기 권한을 준다.
{
    "rules": {
        ".read": true,
        ".write": "auth != null"
    }
}
Firebase Data 형태
 위와 같이 db 밑에 child명을 주고 임의의 인스턴스 값 하위에 model에서 정의한 값을 넣어주면 된다.
동기화 결과
 DB에서 값을 바꿀 경우 바로 동기화되어 view에 반영된다.
23 Jul 2017
|
Android
Java
Firebase
firebase 프로젝트 추가
https://console.firebase.google.com에서 프로젝트 추가

firebase 안드로이드 추가

google-services.json 추가
google-services.json 파일을 app 영역의 root에 집어넣음. (project 보기)
build.gradle 변경
build.gradle(project)에 다음 추가
dependencies {
    classpath 'com.google.gms:google-services:3.1.0'
}
build.gradle(app) 마지막줄에 다음 줄 추가
apply plugin: 'com.google.gms.google-services'
build.gradle(app)의 dependency에 다음 추가 (Notification 사용 라이브러리)
compile 'com.google.firebase:firebase-core:11.0.2'
compile 'com.google.firebase:firebase-messaging:11.0.2'
이후 프로젝트 sync
FirebaseMessagingService 추가
public class MyFirebaseMessagingService extends FirebaseMessagingService {
    private static final String TAG = "FCM Service";
    @Override
    public void onMessageReceived(RemoteMessage remoteMessage) {
        Log.e(TAG, "From: " + remoteMessage.getFrom());
        Log.e(TAG, "Notification Message Body: " + remoteMessage.getNotification().getBody());
    }
}
FirebaseInstanceIdService 추가
public class FirebaseIDService extends FirebaseInstanceIdService {
    private static final String TAG = "FirebaseIDService";

    @Override
    public void onTokenRefresh() {
        // Get updated InstanceID token.
        String refreshedToken = FirebaseInstanceId.getInstance().getToken();
        Log.e(TAG, "Refreshed token: " + refreshedToken);

        // TODO: Implement this method to send any registration to your app's servers.
        sendRegistrationToServer(refreshedToken);
    }

    private void sendRegistrationToServer(String token) {
        // Add custom implementation, as needed.
    }
}
매니페스트에 서비스 추가
<service android:name=".service.MyFirebaseMessagingService">
    <intent-filter>
        <action android:name="com.google.firebase.MESSAGING_EVENT"/>
    </intent-filter>
</service>

<service android:name=".service.FirebaseIDService">
    <intent-filter>
        <action android:name="com.google.firebase.INSTANCE_ID_EVENT"/>
    </intent-filter>
</service>
서비스 태그는 애플리케이션 태그 속에 넣으면 된다.
Notification 보내기
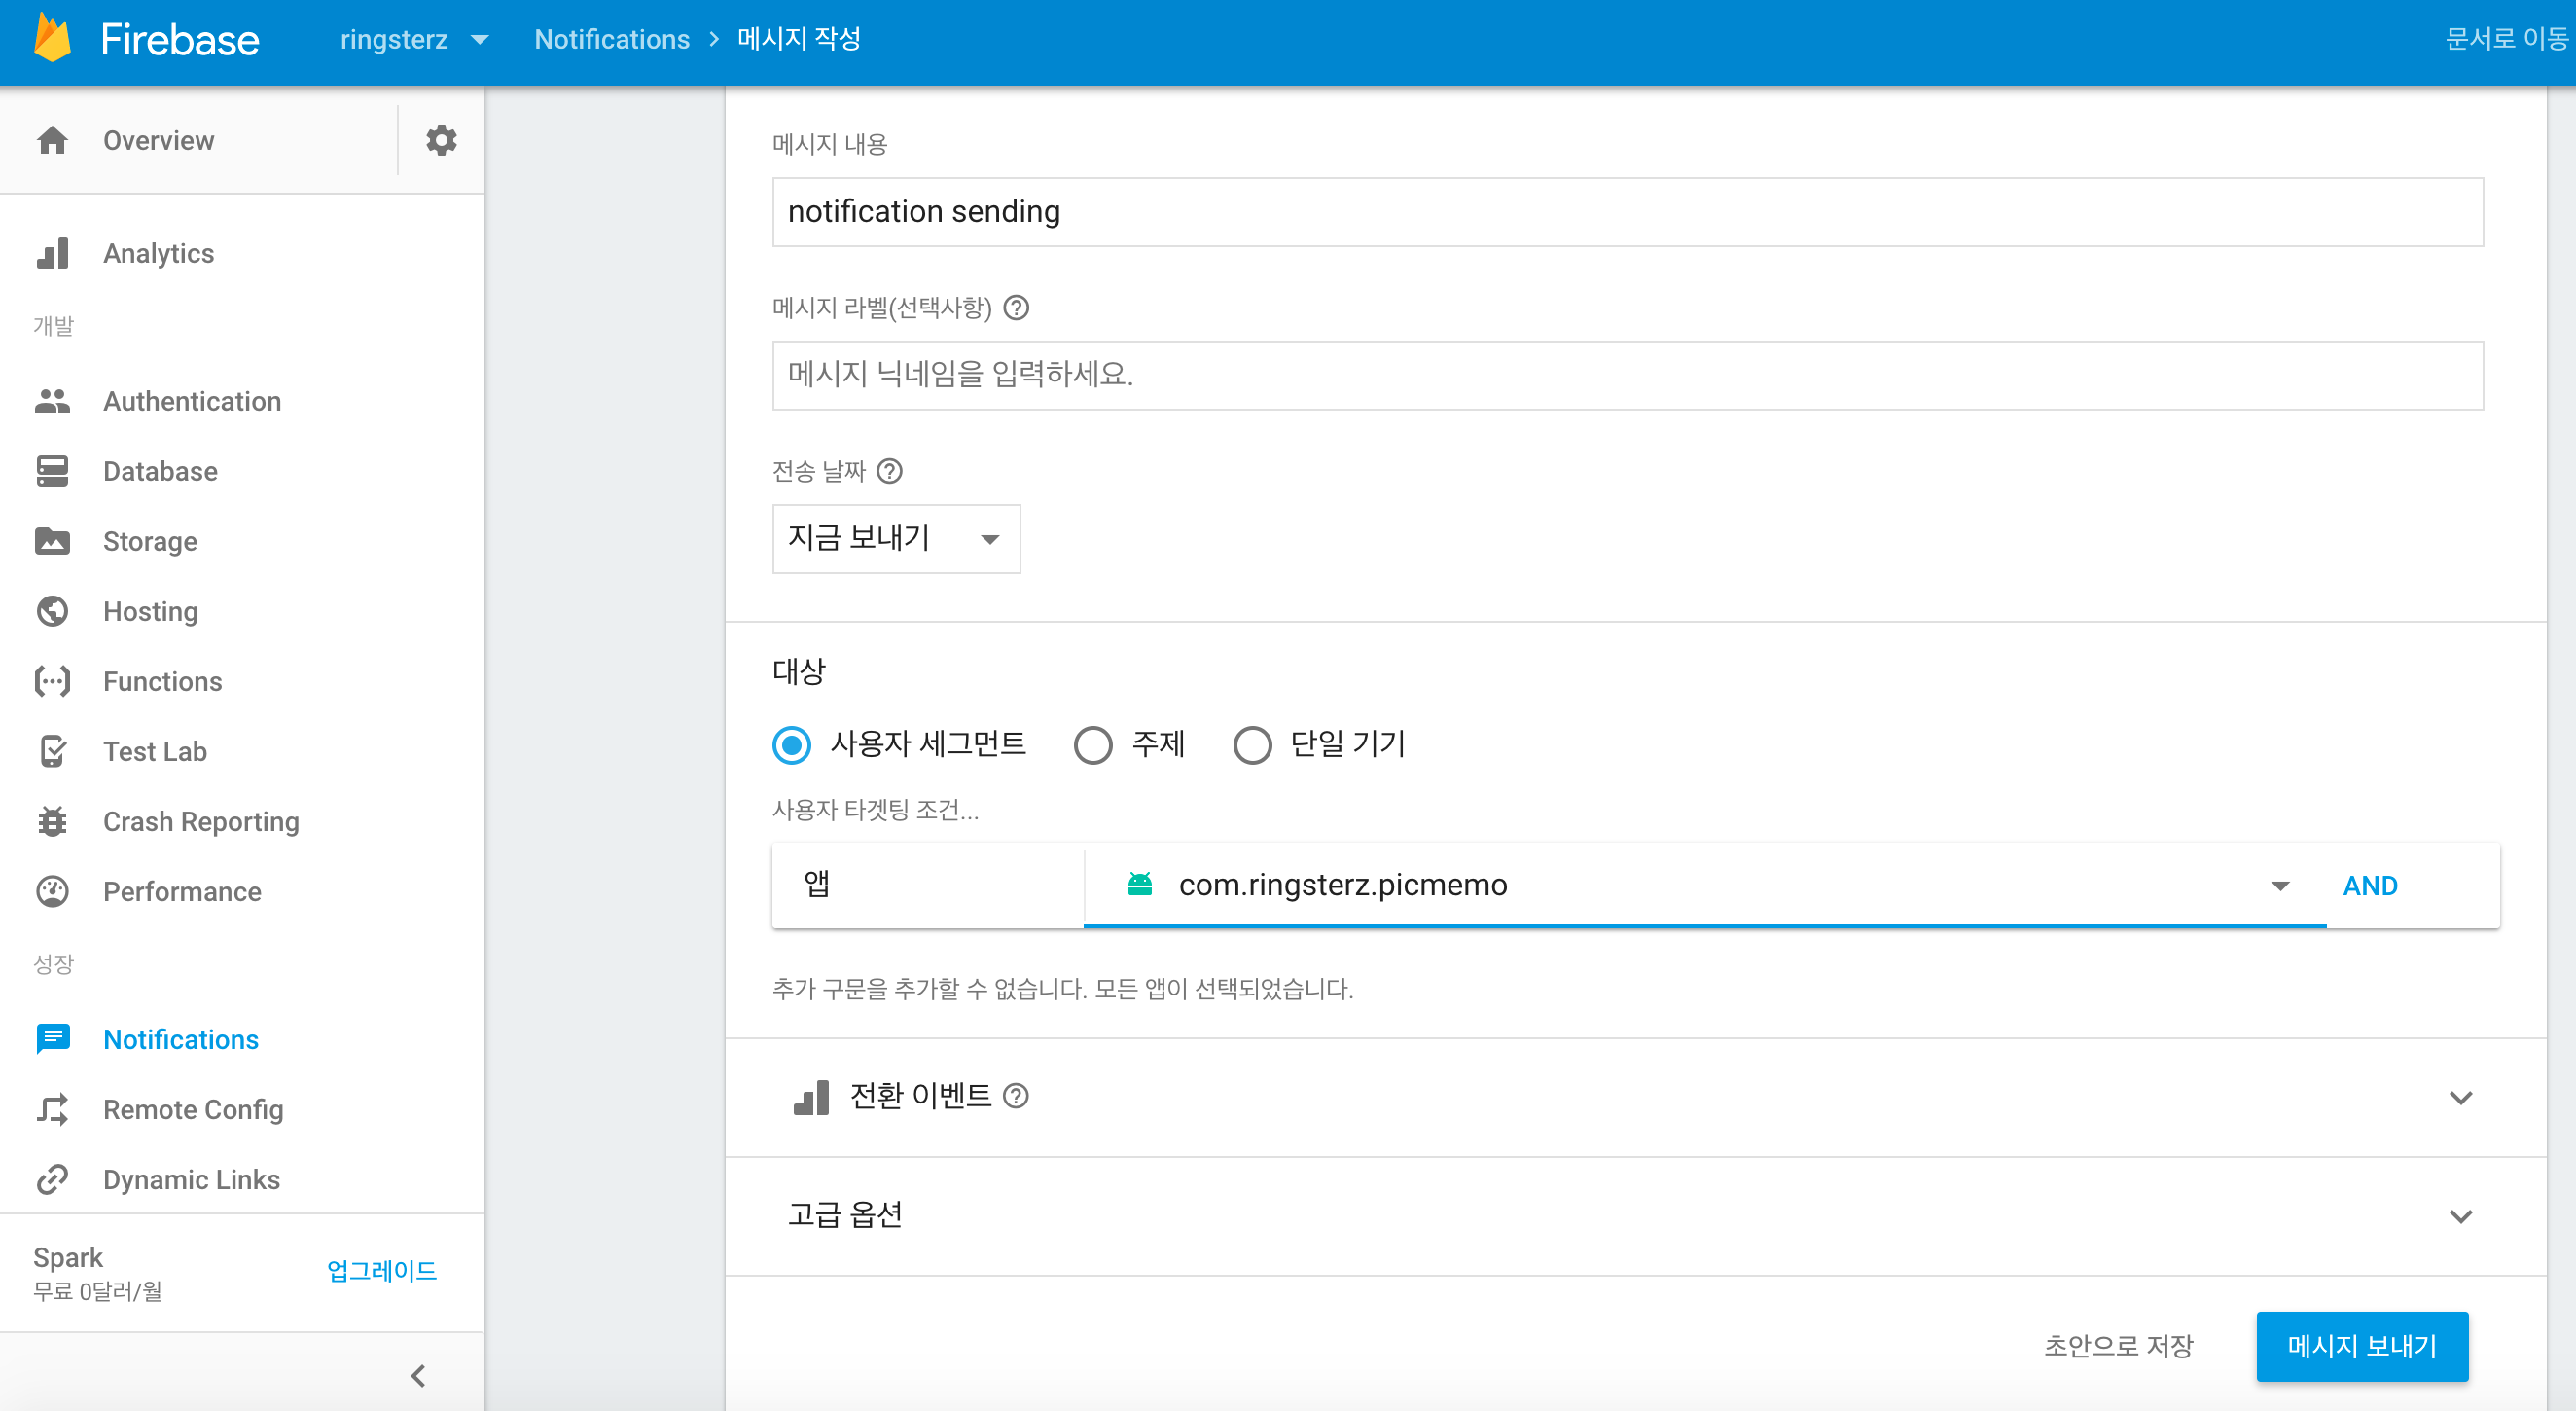 콘솔에서 앱 전체를 대상으로 Notification를 보낸 모습
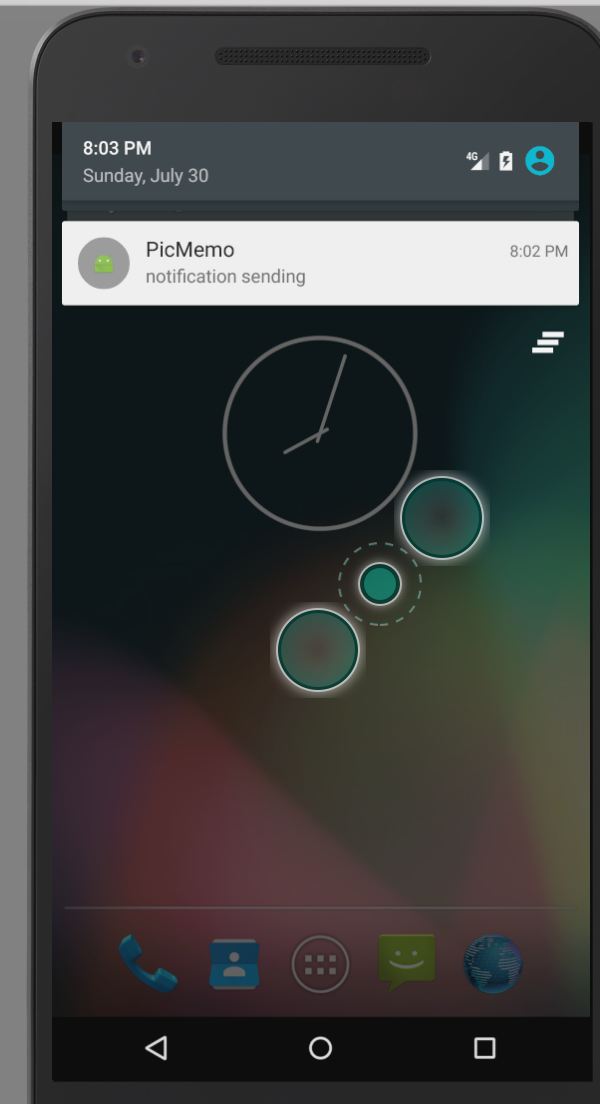
Notification 전송 모습
상태창을 보면 notification이 전송된 것을 볼 수 있다.
앱이 떠있을때는 로그로 정상 출력되는 것을 볼 수 있다.

22 Jul 2017
|
Android
Java
RecyclerView에서는 기본적으로 ViewHolder 패턴을 사용한다.
ListView보다 사용하기 까다로워 보이지만 사용 패턴을 익히면 그렇지도 않다.
RecyclerView 사용패턴
Adapter 생성
RecyclerSwipeAdapter 를 상속한 아답터를 생성한다.
생성자
public RecyclerViewAdapter(Context context, ArrayList<Data> myDataset) {
    mContext = context;
    mDataset = myDataset;
}
데이터와 context를 전달 받는다.
OnCreateViewHoder 오버라이드
@Override
public ViewHolder onCreateViewHolder(ViewGroup parent, int viewType) {
    View v = LayoutInflater.from(parent.getContext())
    .inflate(R.layout.recyclerlayout, parent, false);
    ViewHolder vh = new ViewHolder(v);
    return vh;
}
위와 같이 레이아웃을 인플래이트 시킨 후 뷰 홀더에 집어넣는다.
getItemCount 오버라이드
@Override
public int getItemCount() {
    return mDataset.size();
}
ViewHolder 클래스 생성
public static class ViewHolder extends RecyclerView.ViewHolder {
    private TextView mTextView;

public ViewHolder(View v) {
    super(v);

    mTextView = v.findViewById(R.id.textview);
    }
}
뷰홀더 클래스의 생성자 안에서 사용할 뷰들을 바인드 한다.
onBindViewHolder 오버라이드
@Override
public void onBindViewHolder(final ViewHolder holder, final int position) {
    final Phrase item = mDataset.get(position);

    holder.mTextView.setText(mData.get(position).toString());
    }
}
RecyclerView의 각각의 뷰가 표시될 때 처리할 내용을 작성한다.
Adapter 설정
RecyclerView에 .setAdapter를 통해 아답터를 설정한다.
21 Jul 2017
|
Android
Release
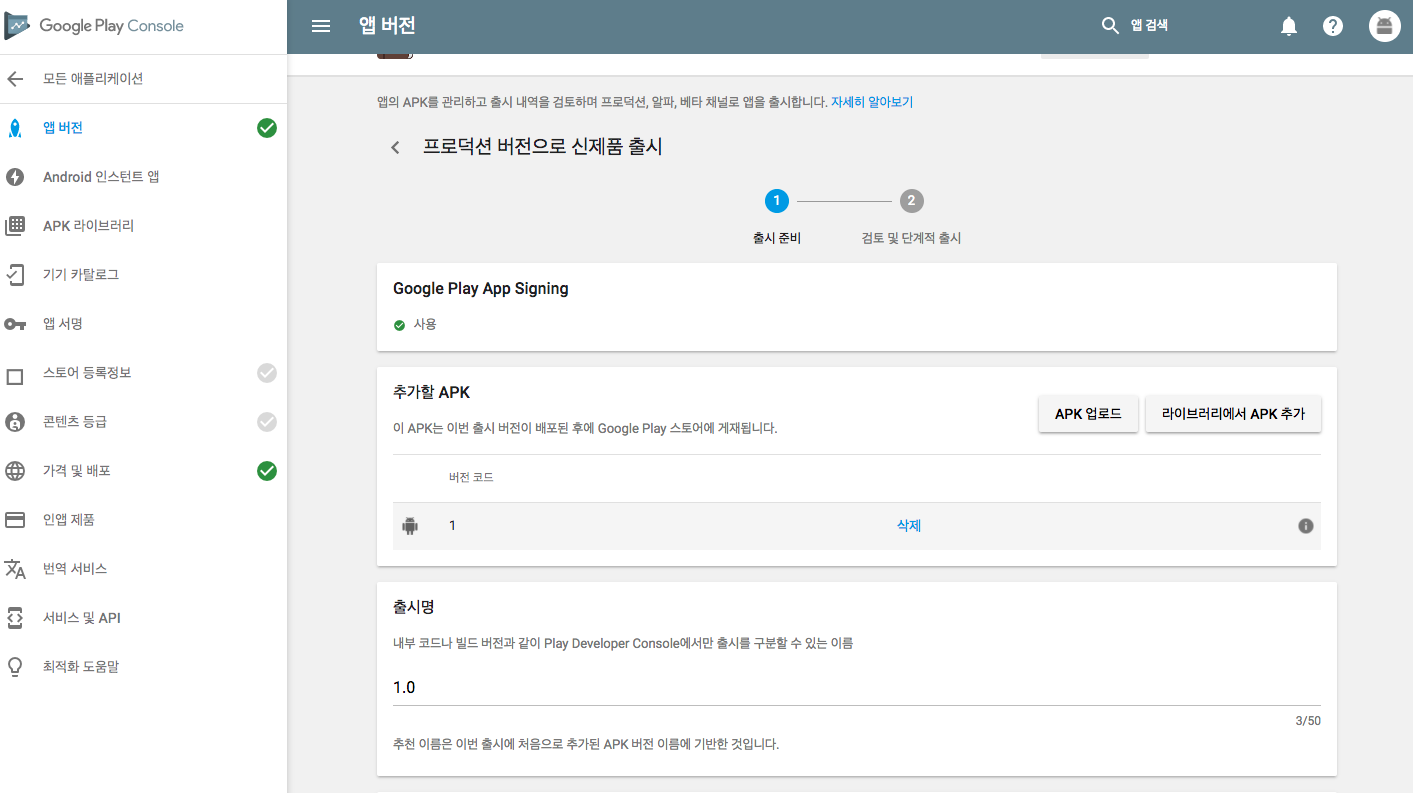
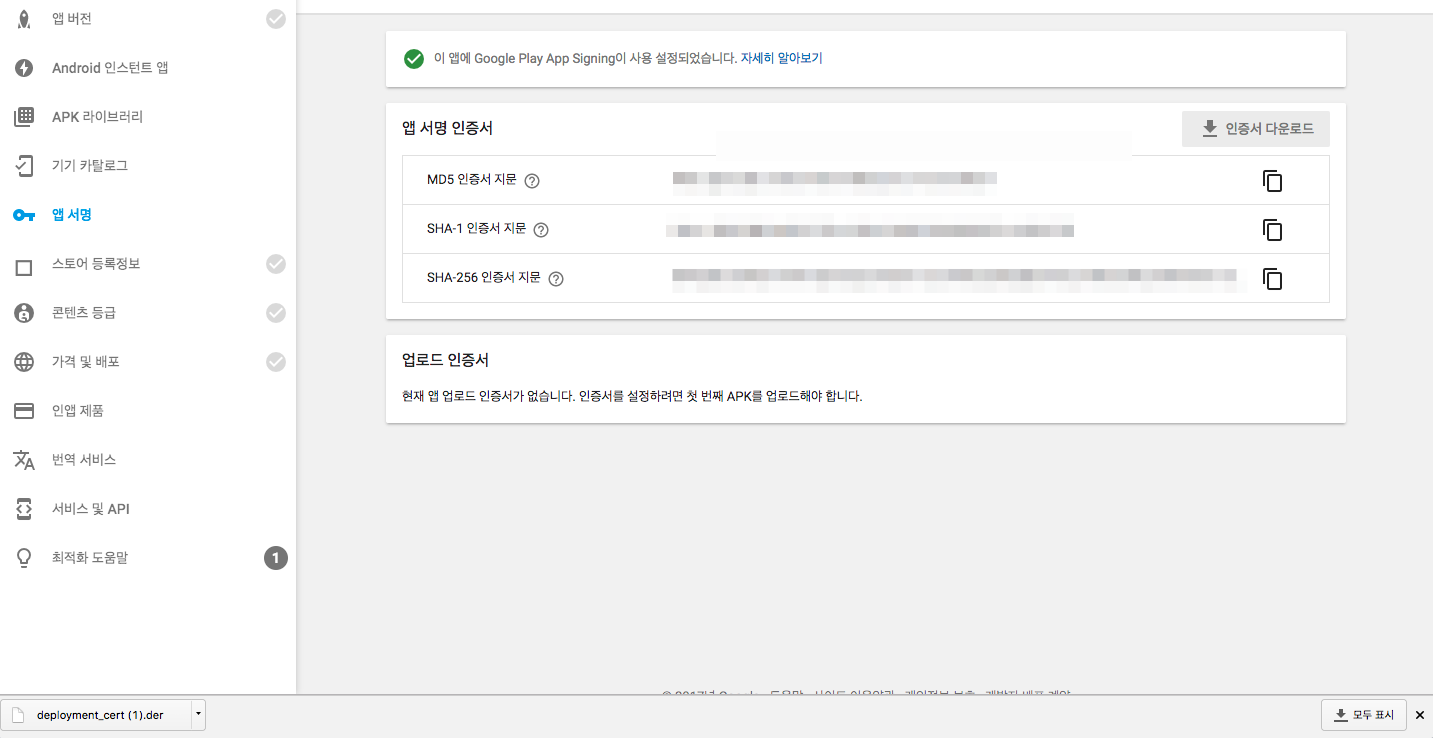 위와 같이 Google Play App Signing을 한번 누르니 다시 돌이킬 수도 없고,
APK를 업로드를 하려니 다음의 화면이 출력되며 apk 업로드도 안된다.
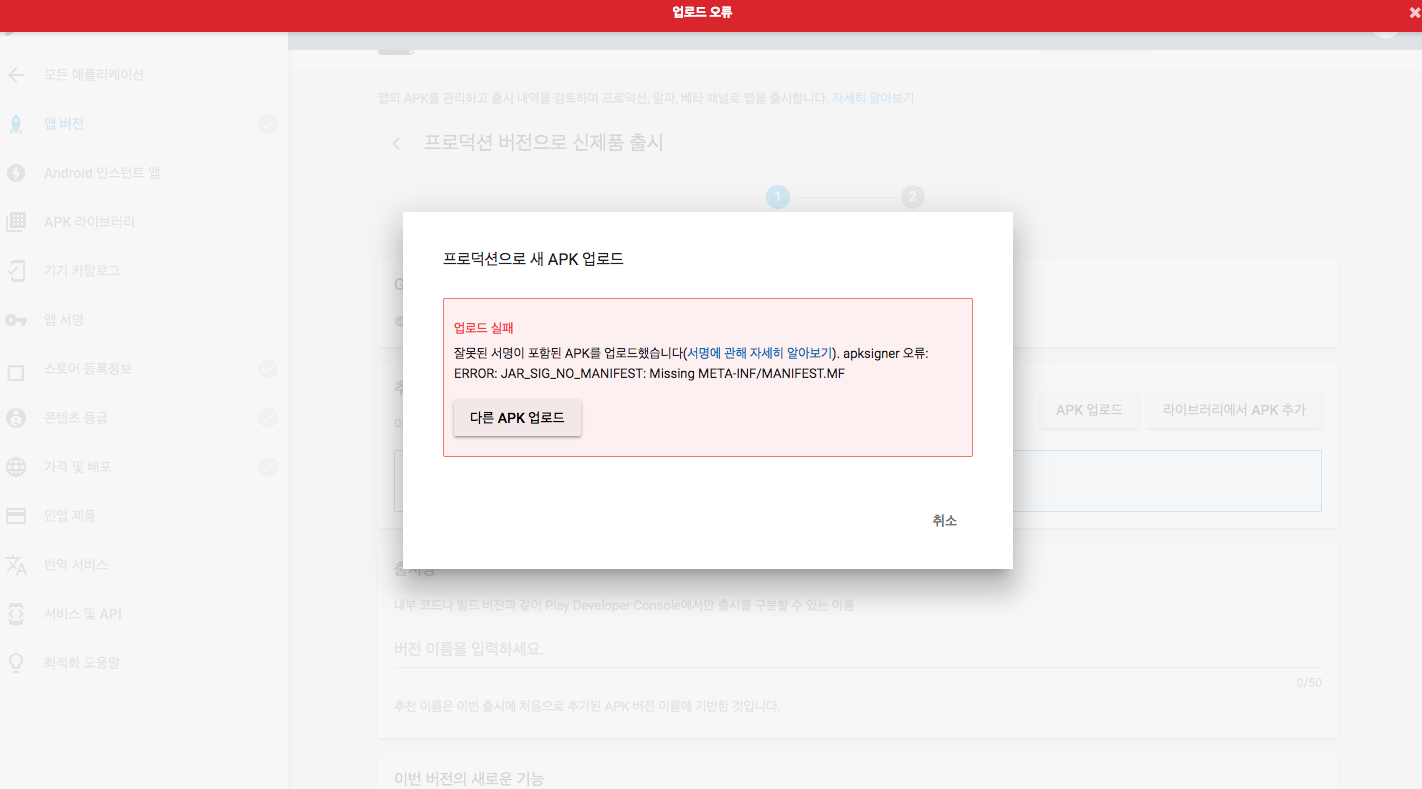
문제 원인
Signed apk를 만들 때 Signature Vesion의 V1을 체크하지 않으면 .jar 파일이 생성되지 않아,
Jar_sig_no라며 jar signature가 없다는 메시지를 뱉는 것이다.
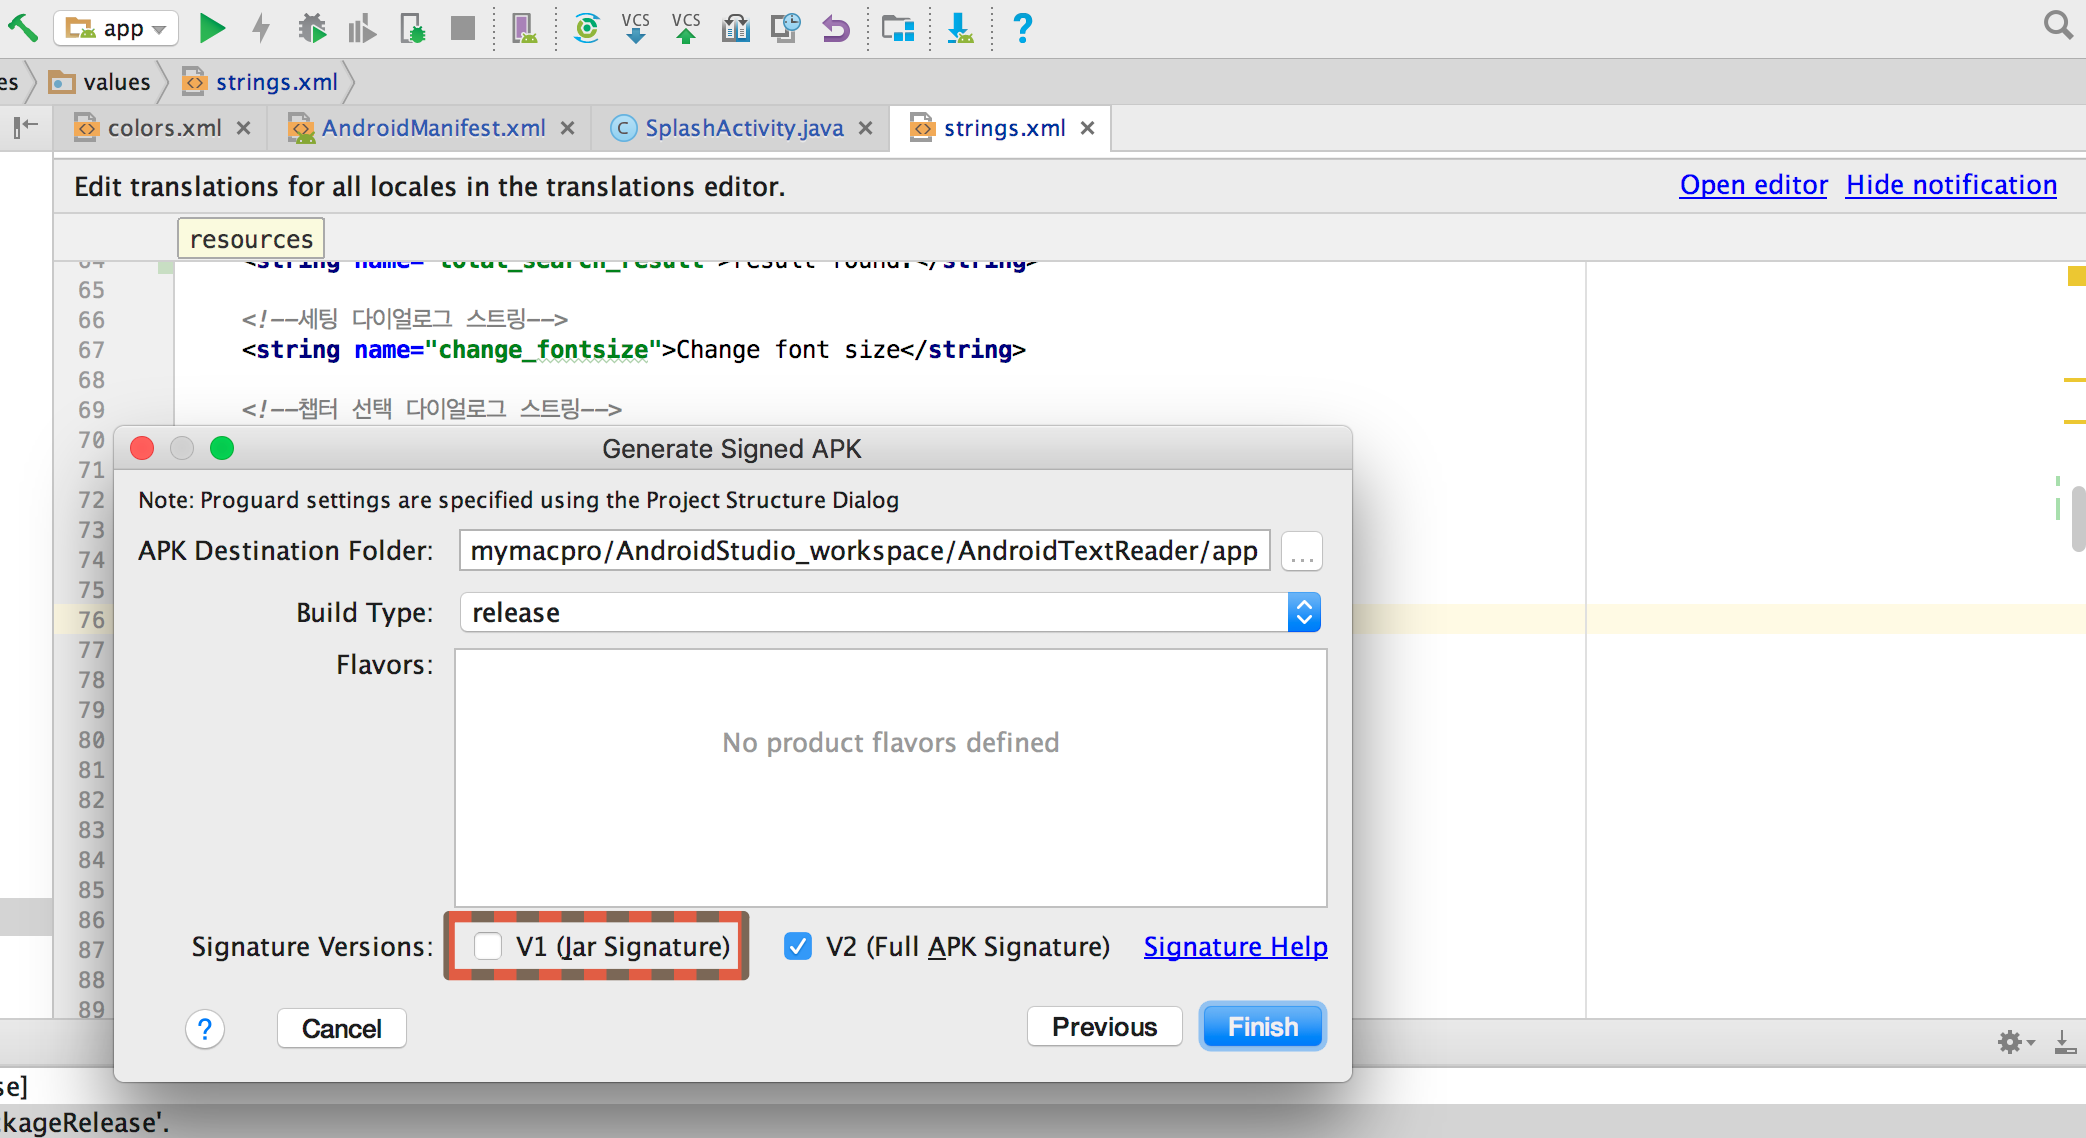
Signature Vesion을 둘다 체크하고 다시 Signed APK를 생성하면 잘 업로드 된다.
 말이 여섯시간이지… 나는 아침까지 자느라 2시간도 채 안남았다고…
그래도 예선 통과를 위한 점수를 맞추기는 할만할것 같아서 Code Jam 사이트에 접속!


 위와 같이 db 밑에 child명을 주고 임의의 인스턴스 값 하위에 model에서 정의한 값을 넣어주면 된다.
 DB에서 값을 바꿀 경우 바로 동기화되어 view에 반영된다.
 콘솔에서 앱 전체를 대상으로 Notification를 보낸 모습

 위와 같이 Google Play App Signing을 한번 누르니 다시 돌이킬 수도 없고,

